


Getting connected while travelling overseas has never been easier thanks to eSIM technology and most people do not realise that over 80 percent of flagship smartphones released after 2019 already support eSIM. You might think swapping SIM cards is the biggest barrier to staying online. Actually, the hardest part is making sure your phone and plan are right before you even leave home. Saving a heap of hassle starts with a few quick checks most travellers overlook.
Quick Summary
| Key Point | Explanation |
|---|---|
| 1. Confirm eSIM compatibility first | Verify if your smartphone supports eSIM technology before travelling to avoid connectivity issues abroad. |
| 2. Choose the right eSIM plan | Evaluate your data needs and compare plans from various providers for optimal coverage and pricing. |
| 3. Purchase and download the eSIM profile | Select a reputable provider that ensures easy activation with a QR code or direct download to your device. |
| 4. Activate the eSIM correctly | Use stable Wi-Fi to activate the eSIM and set it as your primary data source for seamless connectivity. |
| 5. Test the eSIM functionality | Verify that your eSIM works correctly by checking network settings and running a speed test upon arrival. |
Step 1: Confirm eSIM Compatibility with Your Device
Before embarking on your international travel adventure, the first critical step is verifying whether your smartphone supports eSIM technology. Not all devices are created equal when it comes to embedded SIM functionality, so understanding your device’s capabilities is paramount.
Modern smartphones from leading manufacturers like Apple, Samsung, and Google increasingly support eSIM technology, but checking your specific device model is essential. Most recent flagship and mid-range smartphones manufactured after 2019 include eSIM compatibility. To determine your device’s readiness, navigate to your smartphone’s settings menu and look for specific indicators of eSIM support.
For iPhone users, accessing eSIM compatibility is straightforward. Open your Settings app, select General, then tap About. Look for an EID (Embedded Identity Document) number which confirms your device’s eSIM readiness. Apple’s official support documentation provides comprehensive guidance for different iPhone models.
Android smartphone owners should explore their Network or Connections settings. On Google Pixel devices, visit Settings > Network & Internet > Mobile Network and check for options like ‘Add carrier’ or ‘Download a SIM’. Samsung Galaxy users can find similar options under Settings > Connections > SIM card manager. The presence of ‘Add mobile plan’ or ‘Add eSIM’ indicates your device supports this technology.
If your current smartphone does not support eSIM, do not despair. You have alternative options like purchasing a travel SIM card or exploring smartphone upgrade possibilities. Check out our guide on multi-country SIM solutions for additional insights.
Key verification criteria for eSIM compatibility include:
- Smartphone manufactured after 2019
- Option to add mobile plan digitally in device settings
- Presence of EID number in device information
By confirming your device’s eSIM support early, you’ll save time and frustration during your travel preparation, ensuring a smooth connectivity experience across international borders.
Here is a checklist table to help you confirm your device is ready for eSIM before you start the setup process.
| Verification Criteria | How to Check on Your Device |
|---|---|
| Device manufactured after 2019 | Check device information in Settings or About phone |
| Option to add mobile plan digitally | Look for ‘Add Mobile Plan’ or ‘Add eSIM’ in Settings |
| Presence of EID number (for iPhone) | Settings > General > About, look for EID |
| Android: ‘Add carrier’ or ‘Download a SIM’ | Settings > Network & Internet > Mobile Network |
| Samsung: SIM card manager options | Settings > Connections > SIM card manager |
| eSIM provider compatibility | Check with provider for device support confirmation |
Step 2: Choose a Suitable eSIM Plan for Your Destination
Selecting the right eSIM plan is crucial for maintaining seamless connectivity during your international travels. Not all mobile data plans are created equal, and the perfect plan depends on your specific travel requirements, destination, and data consumption habits.
Begin by evaluating your connectivity needs. Consider the duration of your trip, the countries you will visit, and the type of online activities you anticipate. Streaming videos, video conferencing, and constant social media updates consume significantly more data than basic messaging and email communications. Most travellers overestimate their data requirements, so carefully assess your actual usage patterns.
Research providers specializing in international eSIM plans that offer flexibility and comprehensive coverage. Many digital platforms now provide region-specific or global data packages that can be easily downloaded and activated directly on your smartphone. Look for providers offering transparent pricing, clear data limits, and the ability to top up or modify your plan during your journey.
Compare plans across multiple providers, paying close attention to data allowances, validity periods, and network coverage. Some eSIM providers offer pay-as-you-go options, which can be more cost-effective for shorter trips or intermittent data needs. Others provide fixed-duration packages that might offer better value for extended travel.
When selecting your plan, verify the following critical details:
- Supported countries and network coverage
- Data volume and speed limitations
- Plan duration and expiration terms
- Pricing structure and potential additional fees
Learn more about different types of travel SIM solutions that can complement your eSIM strategy. Some travellers find combining multiple connectivity options provides the most reliable communication method.
Before finalizing your purchase, double-check compatibility with your destination’s cellular networks and confirm that the eSIM plan can be easily installed on your smartphone. Most reputable providers offer straightforward activation processes with clear instructions, typically involving a QR code or digital download directly to your device.
By thoroughly researching and selecting a tailored eSIM plan, you’ll ensure reliable internet access, avoid unexpected roaming charges, and maintain connectivity throughout your international adventure.
To make choosing an eSIM provider and plan easier, compare plan features with this convenient table.
| Feature | Why It Matters | What to Check |
|---|---|---|
| Coverage | Ensures access in your destination countries | Supported countries and networks |
| Data volume & speed | Meets your actual usage needs | Data limits, speed restrictions |
| Plan duration & validity | Matches your trip timing | Days/months plan is active |
| Flexibility & top-ups | Lets you adjust on the go | Ability to top up/change package |
| Transparent pricing | Avoids unexpected costs | Upfront costs, any hidden fees |
| Activation process | Simplifies setup | QR code/direct download, ease of installation |
Step 3: Purchase and Download the eSIM Profile
With your device compatibility confirmed and travel destination selected, the next critical step is purchasing and downloading your eSIM profile. This digital process replaces traditional physical SIM card installation, offering a seamless and instantaneous connectivity solution for international travellers.

Begin by selecting a reputable eSIM provider that offers comprehensive coverage for your specific destinations. Most providers have user-friendly mobile applications or web platforms where you can browse and purchase digital mobile plans. Some platforms allow you to preview plan details, including data allowances, pricing, and network coverage, before completing your purchase.
When making your selection, prioritize providers offering straightforward activation processes. Look for platforms that provide instant QR code delivery or direct digital profile downloads. These modern solutions eliminate waiting times associated with traditional SIM card shipping and enable immediate connectivity upon arrival in your destination country.
The purchasing process typically involves creating a user account, selecting your desired plan, and completing the transaction using standard payment methods like credit cards or digital wallets. After successful payment, you will receive a QR code or activation instructions via email or within the provider’s application.
To download your eSIM profile, follow these general steps:
- Open your smartphone’s cellular settings menu
- Select the option to add a new cellular plan
- Scan the provided QR code or enter the activation details
- Confirm the installation when prompted
Explore our travel tips for seamless connectivity to enhance your international mobile experience. Some travellers find it beneficial to download the eSIM profile before departing, ensuring a smooth setup process.
Verify your eSIM profile’s successful installation by checking your device settings. You should see the new cellular plan listed alongside your primary mobile network. Some devices allow you to name the eSIM profile, which can help distinguish between different international plans.
Remember that network activation might require a few minutes, so be patient during the initial setup. Once activated, your eSIM will provide instant access to mobile data in your chosen destination, transforming how you stay connected during international travels.
Step 4: Activate the eSIM on Your Device
Activating your eSIM represents the pivotal moment where digital connectivity transforms from potential to practical. This step bridges your carefully selected mobile plan with actual internet access, requiring precision and a systematic approach to ensure seamless implementation.
Begin the activation process by ensuring you have a stable internet connection, preferably through Wi-Fi. While it might seem counterintuitive, having reliable internet helps smoothly download and configure your eSIM profile. Open the email or application where you received your eSIM activation details, which typically includes a QR code or specific activation instructions from your chosen provider.
On most modern smartphones, navigate to Settings > Cellular or Mobile Network > Add Cellular Plan. Here, you will find an option to add a new plan, usually represented by a plus (+) symbol or ‘Add Cellular Plan’ text. Carefully scan the provided QR code using your device’s camera, following the on-screen prompts. Some devices might require you to manually enter an activation code if QR scanning proves challenging.
Pay close attention to the installation prompts. Your device will likely request confirmation to add the new cellular plan and may ask whether you want this plan to be your primary or secondary data source. For international travel, most users prefer setting the new eSIM as their primary data plan to avoid unexpected roaming charges on their home network.
Key verification steps during activation include:
- Confirming successful QR code or activation code scanning
- Verifying the new cellular plan appears in your device settings
- Checking that data roaming is enabled for your destination
- Ensuring the correct network is selected for mobile data
Explore our comprehensive travel tips to enhance your international connectivity strategy. Some travellers find it helpful to test their new eSIM connectivity before departing by downloading a small file or running a speed test.
After activation, restart your smartphone to ensure all network settings integrate smoothly. Your device should now display the new cellular plan alongside your existing networks. Double-check that data roaming is enabled and that you’ve selected the correct network for mobile data usage.
Remember that activation times can vary. While most eSIM profiles activate instantly, some might take a few minutes to fully propagate across mobile networks. Patience and careful attention to detail will ensure a smooth, hassle-free connectivity experience during your international travels.
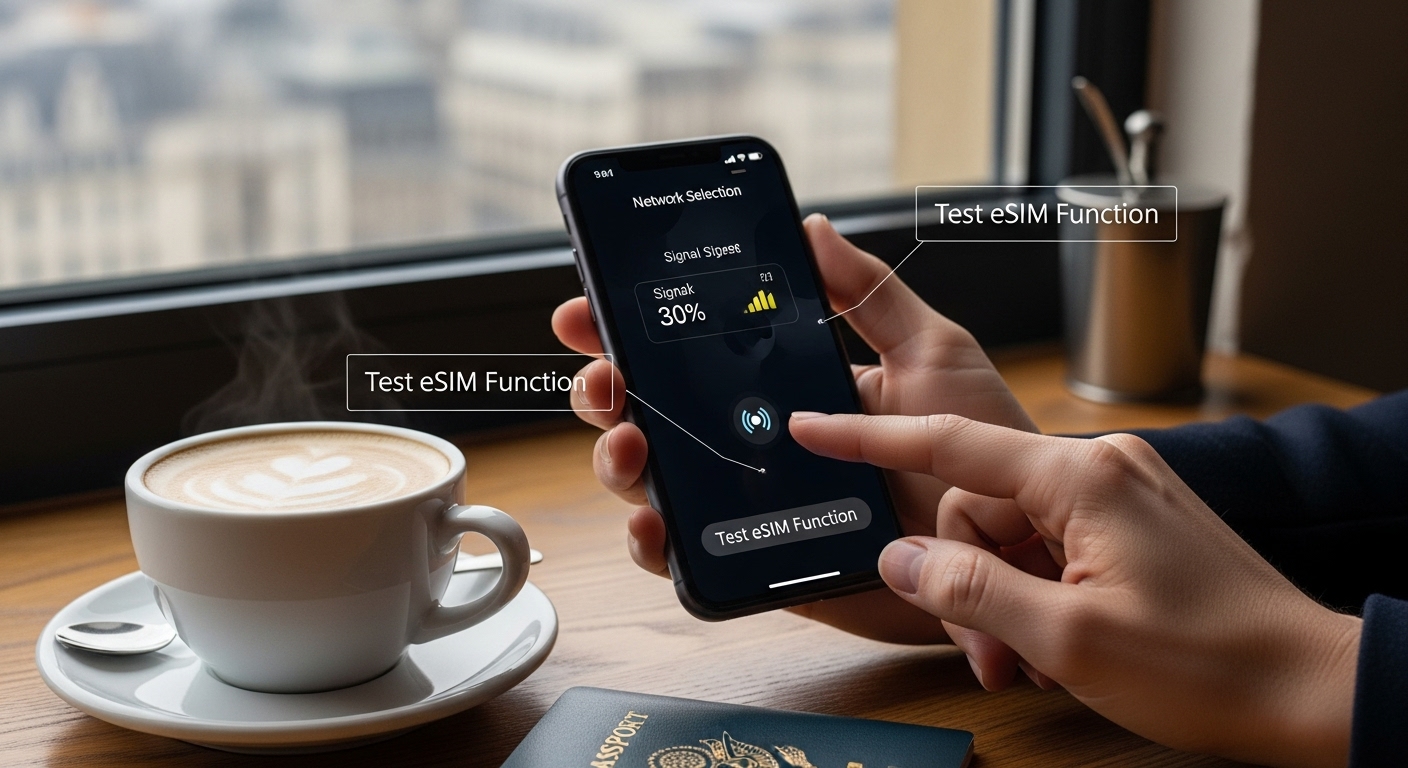
Step 5: Verify Connection and Test the eSIM Functionality
With your eSIM activated, the crucial next step is verifying its functionality and ensuring reliable connectivity in your destination. This verification process is more than a technical checkup it is your gateway to uninterrupted communication and peace of mind during international travel.
Begin by checking your device’s network settings to confirm the eSIM is recognized and selected as an active cellular plan. Navigate to your smartphone’s cellular or mobile network settings and verify that the newly installed eSIM profile appears correctly. Look for signal strength indicators and network name matching your destination country, which signify successful integration.
Conducting a comprehensive connectivity test involves more than just visual confirmation. Open a web browser or speed test application to perform a real-world data connection assessment. Run a quick internet speed test to evaluate download and upload speeds, ensuring your mobile data connection performs as expected. This practical test provides tangible evidence of your eSIM’s operational status and network performance.
Pay special attention to network switching capabilities. Modern smartphones with eSIM technology can seamlessly transition between your home network and the new international plan. Test this functionality by temporarily disabling your primary SIM card and confirming that the eSIM maintains a stable internet connection. Some travellers find it beneficial to enable airplane mode and then re-enable cellular data to force a network refresh.
Key verification steps include:
- Confirming network name matches your destination country
- Running an internet speed test
- Checking signal strength and data connection
- Verifying successful data transmission
Explore our comprehensive travel connectivity guides to enhance your international mobile experience. Some experienced travellers recommend conducting these tests before leaving your home country to address any potential issues proactively.
If you encounter connectivity problems, do not panic. First, restart your device and re-enable cellular data. Check that data roaming is activated and the correct cellular plan is selected. Contact your eSIM provider’s customer support if issues persist, as they can provide specific troubleshooting guidance tailored to your device and destination.
Remember that network performance can vary depending on your location and local infrastructure. A momentary connection hiccup does not necessarily indicate a permanent problem. Patience and systematic troubleshooting will help you resolve most connectivity challenges and ensure a smooth, connected travel experience.
Ready for Flawless eSIM Connectivity on Your Next Trip?
Struggling with unreliable roaming or worried about staying connected while travelling? You are not alone. Many travellers face the headache of device incompatibility, confusing data plans or slow network setup when trying to use eSIM abroad. This guide has covered the step-by-step process to confirm compatibility, select the right plan and activate your eSIM, but choosing the right provider still makes all the difference. Imagine landing in a new country and having instant data from the moment you step off the plane. That peace of mind is possible when you are prepared with trusted travel tech.
Take the guesswork out of your eSIM journey today. Get everything you need in one place by visiting SimCorner.com, Australia’s one-stop destination for international travel connectivity. Shop a range of travel-ready SIM solutions for multiple countries or learn more with our travel tips for seamless mobile use. Act now so you can travel the world without disruption and experience real peace of mind when you go abroad.
Frequently Asked Questions
How can I check if my smartphone supports eSIM technology?
To confirm your smartphone’s eSIM compatibility, go to the settings menu and look for an EID (Embedded Identity Document) number. If your device is manufactured after 2019 and has options to add a mobile plan digitally, it likely supports eSIM.
What should I consider when selecting an eSIM plan for my international travels?
When choosing an eSIM plan, evaluate your connectivity needs based on trip duration, data consumption habits, and activities such as streaming or video conferencing. Compare data allowances, coverage, and pricing structures across different providers to find the best fit for your requirements.
How do I download and install my eSIM profile?
After purchasing your eSIM plan, open your smartphone’s cellular settings, choose to add a new cellular plan, and scan the QR code provided by your eSIM provider. Follow the prompts to confirm the installation.
What steps should I take to verify that my eSIM is functioning properly?
Once your eSIM is activated, check the network settings to ensure it is recognised as an active plan. Run an internet speed test to verify connectivity, and check that data roaming is enabled for seamless browsing in your destination.


