
Picture this: you're out for a run, maybe grabbing a coffee afterwards, or even going for a swim. Your iPhone is safe at home, but your calls, messages, and favourite running playlist are still right there with you, on your wrist.
That’s the kind of freedom an eSIM for your Apple Watch gives you. It’s the digital key that unlocks your watch's potential to be a truly independent device.
Leave Your Phone Behind With an Apple Watch eSIM
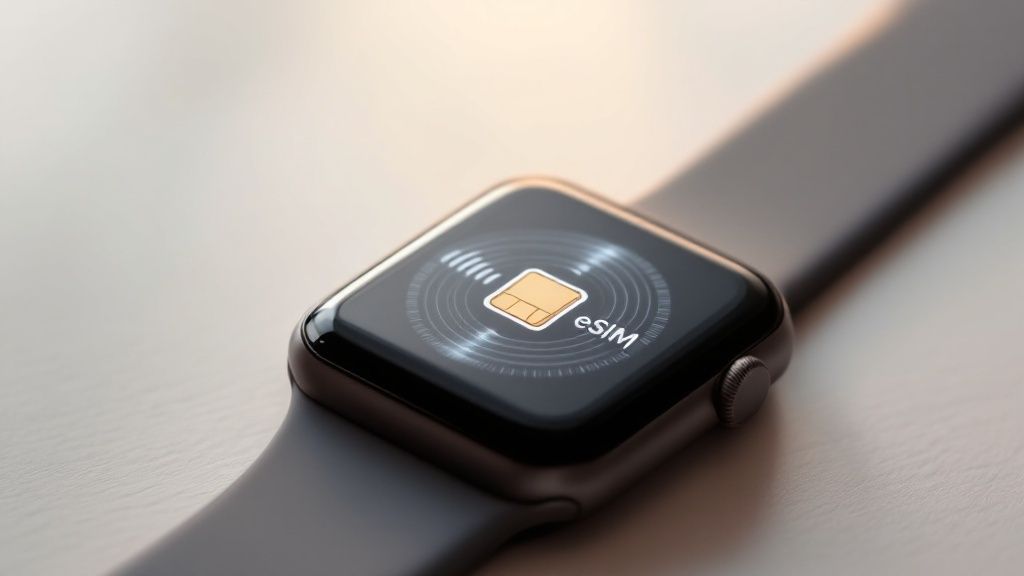
It helps to think of an eSIM not as a tiny plastic card you have to fiddle with, but as a digital SIM profile that’s already built into your watch's hardware. This clever bit of tech lets your Apple Watch connect to a mobile network all on its own, completely untethered from your iPhone.
For active and travel-savvy Aussies, this isn't just a minor convenience—it completely changes how you stay connected on the go. This guide will break down exactly how it works and why it’s become a must-have. We'll walk you through everything, from checking your watch's compatibility to fixing any common hiccups you might encounter.
Why Go Phone-Free?
The biggest drawcard is pure, simple freedom. Imagine jogging along the beach, tapping your watch to pay for a post-run flat white, and streaming a podcast on the way home, all without a bulky phone banging around in your pocket. This standalone connectivity is all thanks to the integrated eSIM, which essentially mirrors your phone's mobile plan on your wrist.
This capability turns your Apple Watch from a cool accessory into a powerful, independent device. The benefits are pretty clear:
- Ultimate Convenience: You can make and receive calls, shoot off texts, and use apps like Maps or Apple Pay, even if your iPhone is miles away.
- Safety and Peace of Mind: Whether you’re hiking a remote trail or just popping down to the shops, you're always reachable in an emergency. No phone needed.
- Enhanced Fitness Tracking: Stream music or podcasts straight to your AirPods during a workout without missing an important call or notification.
As you explore the freedom of leaving your phone behind with an Apple Watch eSIM, remember that your watch also empowers you with other critical standalone features, such as personal health monitoring. You can also learn how to take an ECG directly from your wrist.
How Does an eSIM Actually Work on Your Watch?
To really get how an eSIM for Apple Watch works, it helps to look back at the old way of doing things. A traditional SIM card is basically a physical key for your mobile network—that little bit of plastic you have to pop out and swap every time you change providers. It’s a bit clunky, and frankly, completely impractical for a device as small and sleek as a watch.
An eSIM, or embedded SIM, does away with the physical card altogether. Instead, it’s a tiny, reprogrammable chip that’s soldered directly onto your Apple Watch's mainboard at the factory. Think of it less like a physical key and more like a digital, rewritable one that can be programmed to work with any network, all without needing to swap anything.
This digital approach is the magic that makes true standalone connectivity on your wrist a reality.
The Digital Handshake Process
So, when you activate a new mobile plan, your carrier doesn't mail you a physical card. What they do is send a secure digital "profile" straight to your iPhone. This profile has all the info your watch needs to connect to their network, like special authentication keys and network settings.
During setup in the Watch app, your iPhone securely transfers this profile over to the eSIM chip inside your watch. Once it's installed, the eSIM presents this digital ID to the network, pretty much saying, "Hey, this Apple Watch is authorised to connect." The network recognises the profile, gives the thumbs up, and your watch is officially online—making calls, sending texts, and using data all on its own.
The core idea is simple but powerful: your watch’s identity on a mobile network becomes a secure piece of software, not a removable piece of plastic. This makes connecting your watch as easy as scanning a QR code or tapping a button in an app.
This shift to digital connectivity is fast becoming the norm for wearables. In Australia, the convenience of activating a device from anywhere is a massive reason the eSIM market was valued at around USD 238.6 million in 2024. It’s expected to shoot up to nearly USD 896.9 million by 2033, driven by the popularity of devices just like the Apple Watch.
Why This Matters For You
This move to eSIMs isn't just some technical jargon; it makes a real difference to how you use your watch.
- Effortless Setup: Forget fumbling with tiny plastic cards and poky tools. Activation is all done through software, making it incredibly quick and simple.
- Space-Saving Design: By ditching the physical SIM tray, Apple has more room inside the watch for other goodies, like a bigger battery or more advanced health sensors.
- Enhanced Durability: With one less opening on the case, your watch is better sealed against dust and water.
Ultimately, the eSIM is the key technology that finally untethers your watch from your phone. If you're keen to learn more, you can get the full rundown on what an eSIM is and how it works in our detailed guide. It's this seamless process that makes an eSIM for Apple Watch so essential for anyone who wants true on-the-go freedom.
Checking if Your Apple Watch is eSIM Ready
Before you can unlock the freedom of a truly connected wrist, you’ve got to make sure your gear is up for the job. The good news is, checking compatibility for an eSIM for your Apple Watch is a piece of cake. A few quick checks and you’ll know if you’re good to go.
The most important rule of thumb is that only Apple Watch (GPS + Cellular) models can use an eSIM. The standard GPS-only versions simply don't have the internal hardware needed to connect to a mobile network.
If your watch has that signature red ring or circle on the Digital Crown, you're in luck—that's the classic visual cue of a cellular-capable model. This handy feature has been around for a while now, starting way back with the Apple Watch Series 3 and included in every cellular model since.
Your iPhone and Software Requirements
Think of your iPhone as the command centre for your watch's eSIM—so its compatibility is just as vital. You'll need an iPhone that supports eSIM technology itself and is running a recent version of iOS to properly manage everything through the Watch app.
To sidestep any setup headaches, make sure both devices are up to date:
- Your iPhone: Should be on the latest version of iOS.
- Your Apple Watch: Needs the latest version of watchOS.
You can hunt for updates by going to Settings > General > Software Update on your iPhone and in the Watch app. This ensures all the features needed for activating a mobile plan are present and working as they should. While you're at it, our guide on eSIM compatible phones can give you extra peace of mind.
The huge popularity of these devices is a big reason the market is growing so fast. In the Asia Pacific region alone, Australia holds a significant 5.3% share of the projected USD 3.398 billion eSIM smartwatch market. Apple’s decision to build eSIMs into its watches since the Series 3 has really helped Aussies embrace a more connected, phone-free lifestyle.
Apple Watch and iPhone eSIM Compatibility Checklist
Let's pull it all together. Use this quick reference table to tick off the requirements and confirm your devices are ready for an eSIM from SimCorner.
| Requirement | Details | How to Check |
|---|---|---|
| Watch Model | Must be an Apple Watch (GPS + Cellular), Series 3 or newer. | Look for a red ring or circle on the Digital Crown. |
| iPhone Model | An iPhone 6s or a more recent model is generally needed for pairing. | Check your iPhone model under Settings > General > About. |
| Software Versions | Both devices need the latest iOS and watchOS to work properly. | Go to Software Update in Settings on your iPhone and in the Watch app. |
| Mobile Carrier | Your home provider must support Apple Watch cellular plans. | A quick check on your carrier's website (like Telstra, Optus, or Vodafone) will tell you. |
Once you’ve ticked off these boxes, you can be confident that your devices are primed and ready for activation.
Right, so you've checked that your devices are good to go. Now for the fun part: getting your Apple Watch connected and ready for action. The whole process is surprisingly simple and happens right inside the Watch app on your iPhone. Forget about visiting a store or fiddling with tiny physical SIM cards; you'll be sorted in just a few minutes.
Think of it as a digital handshake. Your iPhone already knows all about your mobile plan, and this setup just extends a friendly welcome to your watch, letting it share your number and data. It's less of a complicated technical task and more like flicking a switch on a feature that was waiting for you all along.
Kicking Off the Activation Process
First things first, make sure your Apple Watch is on your wrist, unlocked, and that your iPhone is close by. They need to be able to chat with each other during the setup, so keeping them in close range is key.
Grab your iPhone and open the Watch app. This is your command centre for everything related to your Apple Watch.
Inside the app, have a scroll down and tap on 'Mobile'. If you've got a cellular model, this is where the magic happens. You should see an option that says something like 'Set Up Mobile' or 'Add a New Plan'. Give that a tap. This will kick off the process of linking up with your Aussie carrier—whether that's Telstra, Optus, or Vodafone—and connecting to your mobile account.
Following Your Carrier's Prompts
After you tap 'Set Up Mobile', the app will hand you over to your carrier's login page. You'll just need to pop in your account username and password to give it the green light.
Once you’re in, just follow the instructions on the screen. Your provider will quickly check if your account is eligible and then walk you through adding the watch to your existing plan. For most people, this just means agreeing to a small monthly fee to enable the number-sharing feature.
This simple visualisation breaks down the core steps for getting your eSIM for Apple Watch up and running.
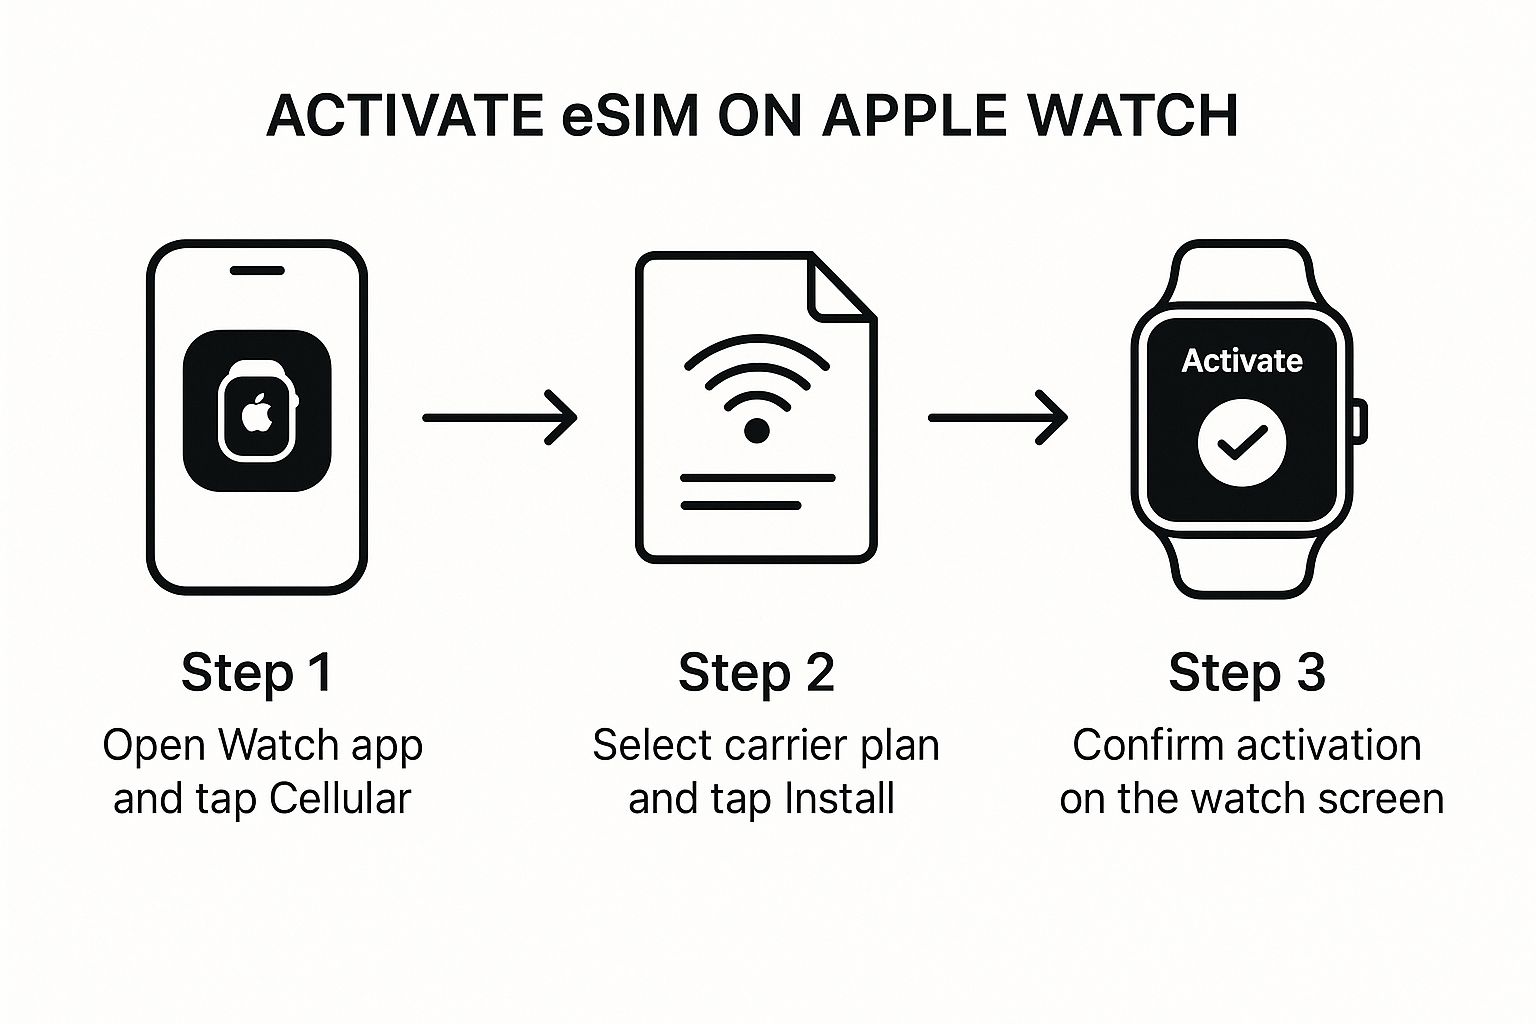
The graphic really shows how smoothly the process flows, starting on your iPhone and ending with the final confirmation on your watch. It’s designed to be as user-friendly as possible.
Once you've given the final okay, the plan will start downloading to your watch's built-in eSIM. This can take a few minutes, so now’s a good time to grab a cuppa. It's totally normal for your watch to show 'No Service' for a little bit while this is happening.
Don't stress if the connection isn't instant. Your watch is busy talking to the network and getting your new eSIM profile all set up. You can keep an eye on it in the Watch app under 'Mobile'—it'll say 'Activating' and will change to your carrier's name once it's all done.
You’ll know it’s worked when your watch connects to the mobile network on its own. A great way to test it is to turn off the Wi-Fi and Bluetooth on your iPhone or just wander out of its range. The little status icon at the top of your watch face should turn green, which means you have a solid cellular connection. And just like that, you're officially untethered and ready to go.
How to Use Your Apple Watch eSIM for Travel
For any seasoned traveller, staying connected without juggling a second phone or a pocketful of SIM cards is the goal. This is exactly where an eSIM for your Apple Watch comes into its own, transforming it from a cool gadget into an absolute travel essential that can save you a fortune on international roaming fees.
The magic is in its ability to hold more than one mobile plan at a time. While your regular Australian plan stays put on your watch, you can add a second, temporary travel eSIM for wherever you're headed. This gives you direct access to cheap local data rates overseas, all from your wrist.
Unlocking Global Connectivity
Picture this: you land in a new country, and your watch instantly connects to a local network. No SIM swapping, no frantic search for airport Wi-Fi. A travel eSIM makes this a reality. Instead of copping those eye-watering roaming charges from your home provider, you can buy a data plan from a provider like SimCorner specifically for your destination.
This approach has some serious perks for travellers:
- Massive Cost Savings: Local data plans are always dramatically cheaper than standard international roaming rates. Say goodbye to that dreaded post-holiday bill shock.
- Ultimate Convenience: You can sort it all out before you even leave home. Buy and activate your plan, and you'll be connected the moment you land, ready to book a ride-share or pull up directions.
- Seamless Integration: Your primary number stays active on your iPhone for calls and texts, while your watch taps into the travel eSIM for data-heavy tasks like maps, messages, and notifications.
Choosing and Activating Your Travel Plan
Getting set up is incredibly simple. The first thing you need to do is pick a plan that fits your trip's length and how much data you think you'll chew through. If you're backpacking and relying heavily on maps and on-the-go research, you’ll need a bigger data allowance than if you're just kicking back at a resort.
When you're looking at plans, always double-check which countries are covered. Many providers offer regional eSIMs, which are perfect for multi-country trips. A single Europe eSIM, for example, can keep you connected across dozens of countries without ever needing to switch plans.
Once you've purchased your plan, you'll usually get a QR code sent to your email. The activation process is pretty much the same as setting up your watch in the first place:
- Open the Watch app on your iPhone.
- Go to Mobile and tap Add Plan.
- Scan the QR code you received from your travel eSIM provider.
It’s always a good idea to get this done before you fly. This way, everything is ready to go, and you can switch over to your travel plan as soon as the plane touches down. While you’re planning, you might want to learn more about how a Europe eSIM can keep you connected while travelling through Europe. Using a travel eSIM on your Apple Watch gives you the freedom to explore with confidence, knowing you have reliable and affordable data right there on your wrist.
Troubleshooting Common Apple Watch eSIM Problems
Even the most straightforward tech can hit a bump in the road sometimes. If your Apple Watch eSIM is giving you grief, don't panic—most of the common hiccups have surprisingly simple fixes. Seeing frustrating errors like "Activation Failed" or a stubborn "No Service" status can feel like a showstopper, but they can usually be sorted out with a few quick steps.
Let's start with the basics, because more often than not, this is all you’ll need. A quick restart of both your iPhone and your Apple Watch can work wonders, clearing out any temporary glitches that might be getting in the way of the activation. It's also a good idea to double-check that both devices are running the latest software, as updates often contain crucial carrier settings and bug fixes.
Pinpointing the Issue
If a restart didn’t quite get you there, it's time to dig a little deeper. Sometimes, the problem is as simple as a weak mobile signal. Before you try activating again, make sure you're in an area with solid network coverage. In other cases, the issue might lie with the mobile plan itself.
This sort of thing is more common than you'd think. While eSIM compatibility in wearables is expected to hit 99% by 2025, a lot of users still aren't fully clued in on what their devices can do. In Australia, for instance, consumer awareness of eSIMs jumped from just 20% in 2020 to around 50% by 2025. Yet, many people still don't realise their Apple Watch is eSIM-ready or how to get it going. You can learn more about these eSIM adoption statistics to see how the trends are shifting.
To help you get back on track, we've put together a quick guide for the most frequent issues you might face.
Common eSIM Problems and Solutions
Think of this table as your first port of call for diagnosing and fixing any eSIM headaches on your Apple Watch.
| Problem | Potential Cause | Recommended Solution |
|---|---|---|
| Activation Failed | This is often due to a temporary network issue or incorrect account details. | Restart both devices and try activating again in an area with a good signal. Also, double-check that your carrier login details are correct. |
| No Service Displayed | The activation might still be processing, or there could be a network settings issue. | Give it about 10-15 minutes after setup. If it doesn't resolve, try toggling Aeroplane Mode on and off. Resetting network settings on your iPhone can also clear the jam. |
| Plan Not Showing Up | Your carrier plan isn't properly synced or might not be supported. | Get in touch with your carrier (like Telstra or Optus) to confirm your mobile plan includes support for an Apple Watch. |
These solutions cover the vast majority of problems you're likely to encounter.
If you’ve run through all these steps and are still stuck, it might be time to get in touch with your carrier’s support team. They have the tools to check for any issues on their end and can walk you through a fix.
A Few Common Questions
Even after a smooth setup, it's natural to have a few questions about what it's really like to use an eSIM on your Apple Watch day-to-day. We get these all the time from our Aussie customers, so let's clear up some of the most common ones.
Will the eSIM drain my watch battery?
The short answer is yes, a little. Firing up the cellular connection means your watch's modem has to work to find and hold a signal, which uses more juice than just relying on a Bluetooth link to your phone. This is especially true if you're in an area with patchy network coverage.
That said, you should still easily get through a normal day on one charge. Where you’ll really notice the difference is during long activities without your phone, like running a marathon or a long hike. If you want to squeeze every last drop of power out of your battery, you can simply flick the cellular connection off right from your watch's Control Centre.
Can I get a different phone number for my Apple Watch?
Not in Australia, no. Our major carriers—Telstra, Optus, and Vodafone—all set up the Apple Watch eSIM to mirror your iPhone's number and plan. You might hear them call it 'number sharing' or 'one number'.
The whole point is to create a totally seamless experience. When someone calls or texts your mobile number, it rings on both your phone and your watch simultaneously. It’s not possible to activate the watch with its own, separate phone number.
Think of it this way: your watch is meant to be a true extension of your phone, not a whole new device with a separate identity. That shared number is what makes the magic happen.
What happens to my plan when I get a new Apple Watch?
Apple has made this bit of 'life admin' incredibly easy. When you unpair your old watch, your iPhone will ask if you want to keep or remove your mobile plan. Make sure you tap the option to keep it.
Then, when you start setting up your shiny new Apple Watch, your iPhone will see that stored plan and prompt you to transfer it over. A few taps and you’re done—your cellular service moves to the new watch without any need to call your provider or fiddle with another QR code.
Ready to unlock what your Apple Watch can really do on your next holiday? Check out our hassle-free international travel plans at SimCorner and get your travel eSIM today!


