
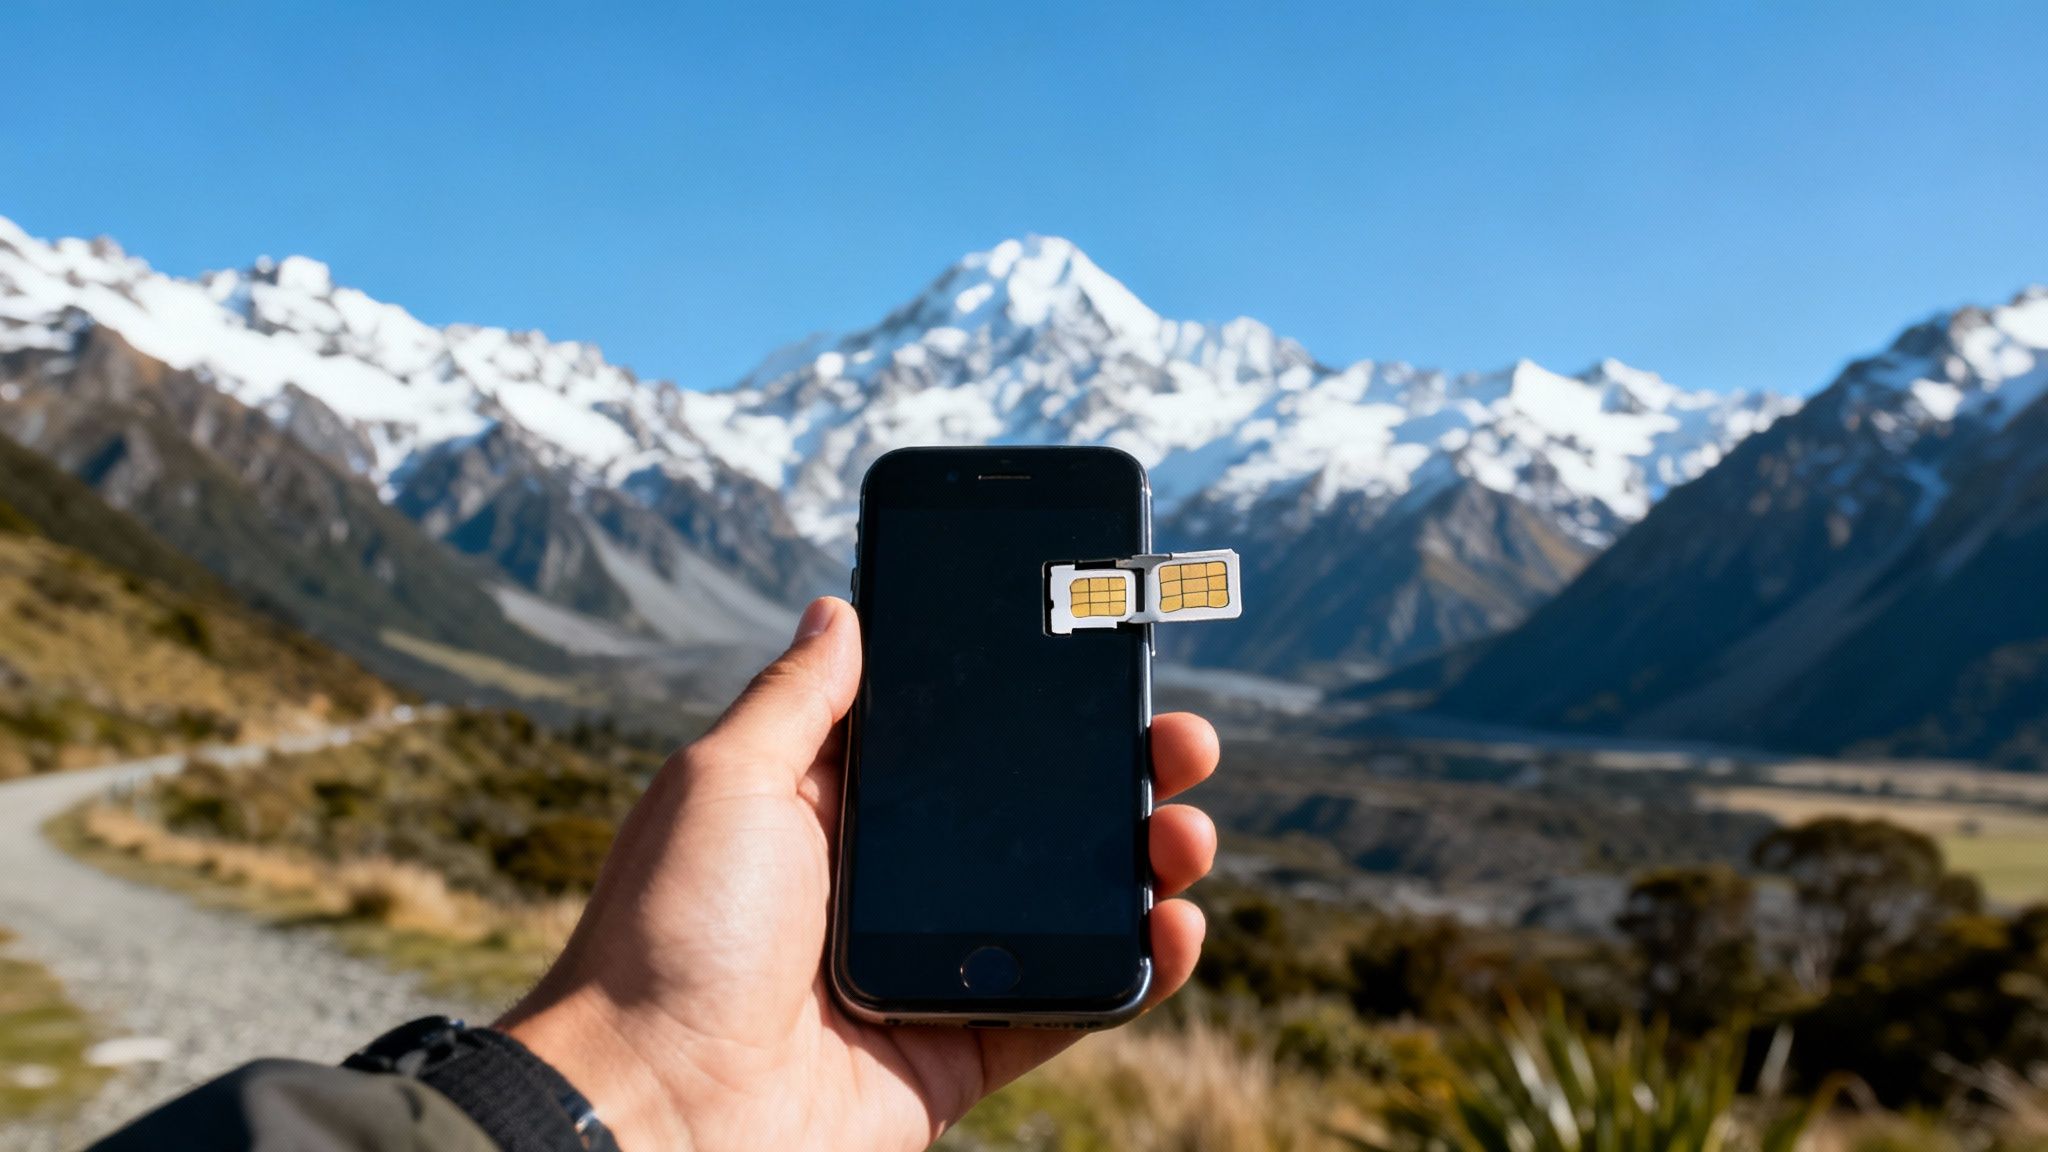
Picture this: you're navigating the breathtaking roads of Fiordland, or you've just witnessed a Queenstown sunset that's too good not to share instantly. A local tourist sim new zealand is your key to doing just that, without a single worry about dodgy Wi-Fi or eye-watering roaming charges.
Why a Local SIM Is Your New Zealand Travel Essential
Honestly, relying on your home country's roaming plan in New Zealand is a recipe for a holiday headache. It often leads to shocking bills and frustratingly slow data right when you need it most. That’s the freedom a local SIM gives you—it’s an indispensable part of any modern travel kit.
A dedicated tourist SIM is a simple, pay-as-you-go solution. Think of it as your digital pass to Aotearoa, unlocking fast, widespread mobile networks for a tiny fraction of what you'd pay for international roaming. With a local SIM, you can fire up Google Maps for directions, book that last-minute hotel, or video call your family from a remote beach without any stress.
Meet the Main Mobile Players
In New Zealand, the mobile scene is mostly run by two big names: Spark and One NZ (which you might remember as Vodafone). Both offer really competitive prepaid plans aimed squarely at travellers like you. You can grab one the moment you land at major airports, from their official stores, or even at local convenience shops, which Kiwis call "dairies".
Staying connected doesn't have to break the bank. Tourist SIM cards in New Zealand typically start from around 20 New Zealand dollars (NZD), giving you a good amount of data for a short trip. You'll find plans ranging from 2GB all the way up to 100GB, with prices sitting between NZD 29 and NZD 99, depending on how long you're staying and how much data you need.
To give you a clearer idea, here's a quick rundown of what you can generally expect.
Quick Look at New Zealand Tourist SIM Options
If you're trying to make a quick decision right after landing, this table breaks down the typical features you'll find with most tourist SIM plans in New Zealand.
| Feature | Typical Offering |
|---|---|
| Price Range | NZD 20 – NZD 99 |
| Data Allowances | 2GB – 100GB+ |
| Validity | 14 days to 60 days |
| Calls & Texts | Often includes a set amount of local/international minutes and texts |
| Main Providers | Spark, One NZ |
| Where to Buy | Airports, provider stores, convenience stores (dairies) |
This should help you quickly compare what's on offer and pick the best value for your trip.
Your First Big Decision: Physical SIM vs. eSIM
Before you even look at data packages, you'll need to make a choice: go with a classic physical SIM card or the more modern eSIM?
A physical SIM is the traditional, tangible chip you pop into your phone's SIM tray. An eSIM, or embedded SIM, is a digital version that you download and activate, often before you even leave home.
It’s a bit like choosing between a trusty paper map and a slick GPS app. Both get you where you need to go, but one offers a different level of convenience. A physical SIM works in just about any phone and is easy to find as soon as you arrive. An eSIM, on the other hand, gives you instant activation and the flexibility to switch between plans with just a few taps on your screen.
To get a better handle on this travel tech, it's worth checking out our guide on what a tourist SIM card is and how it all works.
Choosing Between a Physical SIM and an eSIM
When you're sorting out the details for your New Zealand trip, one of the first tech hurdles is figuring out how to get your phone connected. The choice between a physical SIM and an eSIM is a bit like deciding between a classic paperback and a Kindle. They both get the job done, but the experience is worlds apart.
A physical SIM is that little bit of plastic you’re probably used to. You pop it out of its credit-card-sized holder, hunt for the tiny SIM tray on your phone, and slide it in. The beauty of these is their universal compatibility—they work with just about any phone made in the last decade and you can grab one easily at airports or local corner stores (called 'dairies' here in NZ).
An eSIM, on the other hand, is a completely digital affair. No physical card exists. Instead, you download a data plan straight onto a chip that's already built into your phone. This is a game-changer because you can get it all sorted before you even pack your bags, activating it the moment you touch down in Auckland or Queenstown.
The Reliable Classic: Physical SIM
The biggest drawcard for a physical SIM card is its sheer simplicity. It's a plug-and-play solution that just works. If your phone has a SIM tray, you’re good to go. You don't need to fiddle with settings or check compatibility lists, making it a bulletproof option for anyone who wants a no-fuss setup.
Of course, this old-school method has its trade-offs. You have to actually get your hands on the card when you arrive, which might mean lining up at a kiosk after a long-haul flight. You've also got to keep your original SIM card safe, and let's be honest, those tiny things have a knack for disappearing into the depths of a backpack.
The Modern Convenience: eSIM
The main appeal of an eSIM is pure, unadulterated convenience. You can buy and install your tourist sim new zealand plan from your couch, days before you fly. No more fumbling with tiny plastic cards and ejector tools; a quick scan of a QR code is usually all it takes to get you online.
This digital approach is also incredibly flexible. Since the eSIM is embedded in your phone, you can store multiple plans at once. This is perfect if you want to keep your home number active for calls or two-factor authentication texts while using your New Zealand eSIM for all that glorious, affordable data. The only real catch is that eSIMs are only supported by newer smartphones.
This infographic lays out the key differences when it comes to getting set up.
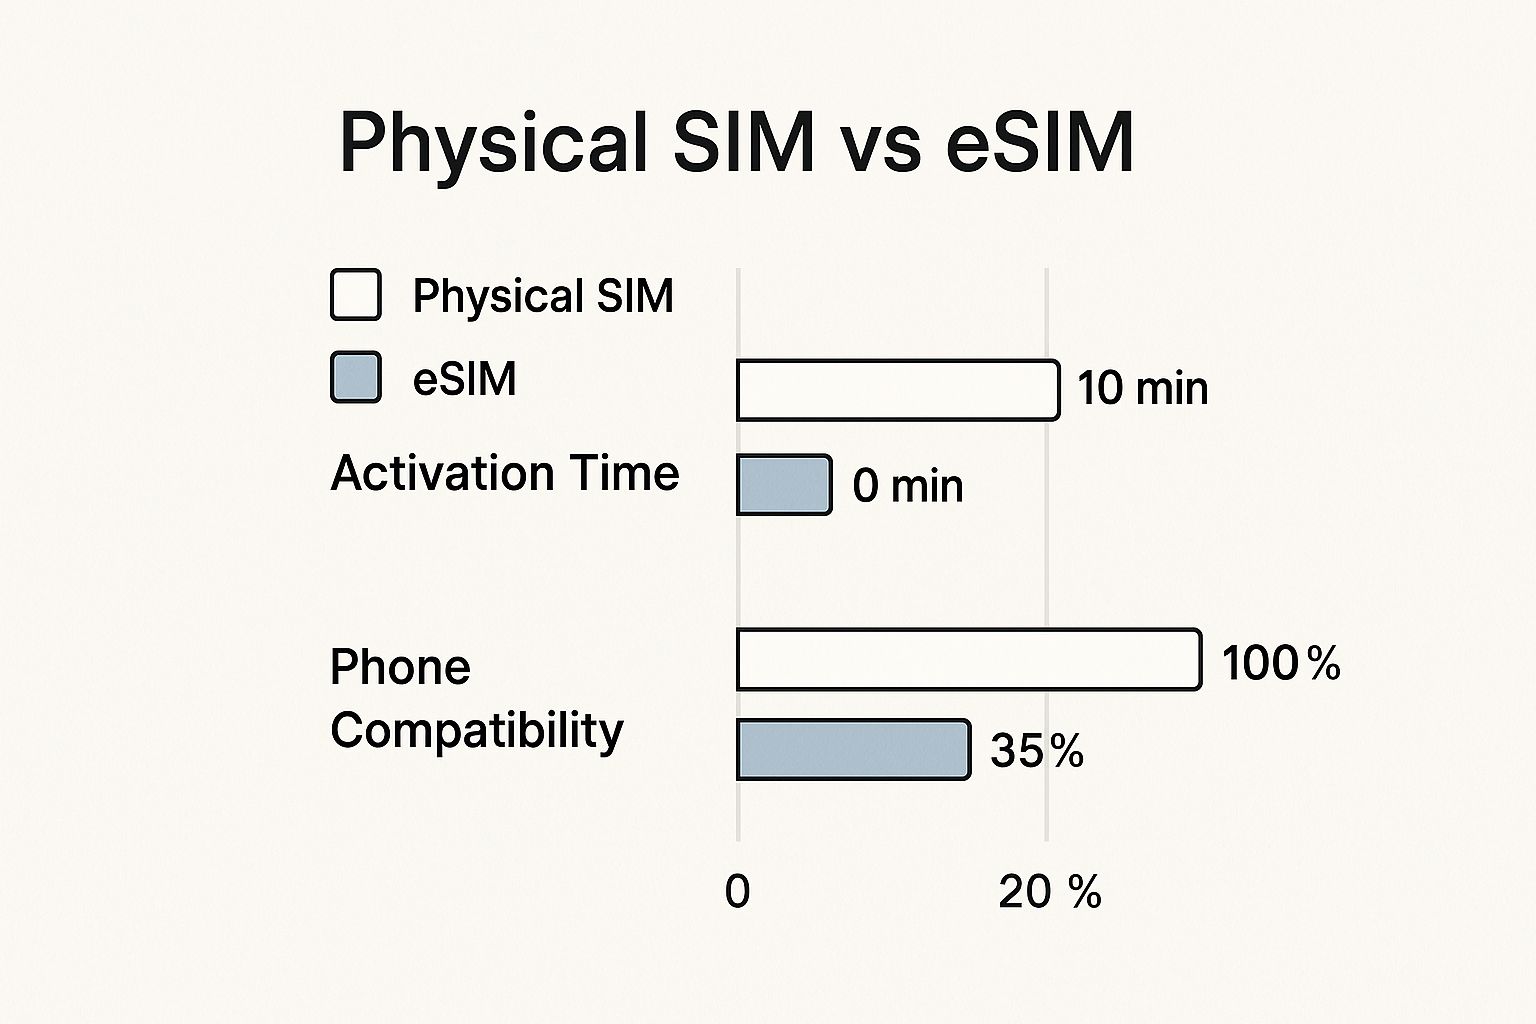
As you can see, while physical SIMs have compatibility on their side, eSIMs offer that instant, zero-minute activation that is just perfect for the modern traveller.
Making the Right Choice for Your Trip
So, which one should you go for? It really boils down to your phone and your personal travel style. To help you decide, here’s what to consider:
- Phone Compatibility: Is your phone eSIM-ready? A quick Google search of your model will give you the answer. If it's not, a physical SIM is your only route.
- Convenience: Do you want to be online the second the plane wheels hit the tarmac? An eSIM lets you pre-load everything.
- Flexibility: Need to keep your home number active while using a local data plan? An eSIM makes this a breeze without needing a dual-SIM phone.
Both options will get you connected for your adventure through Middle-earth. It's simply a matter of whether you prefer the tried-and-true reliability of a physical card or the seamless, modern ease of a digital one. For a deeper look at the tech, check out our complete guide on the differences between an eSIM vs a physical SIM.
Alright, you've sorted out whether you're going with a physical SIM or an eSIM. The next big question is: which network do you actually use?
In New Zealand, it pretty much comes down to two main players: Spark and One NZ. You might remember One NZ by its old name, Vodafone. While there is a third provider, 2degrees, most travellers find that the huge networks of the big two are going to serve them best.
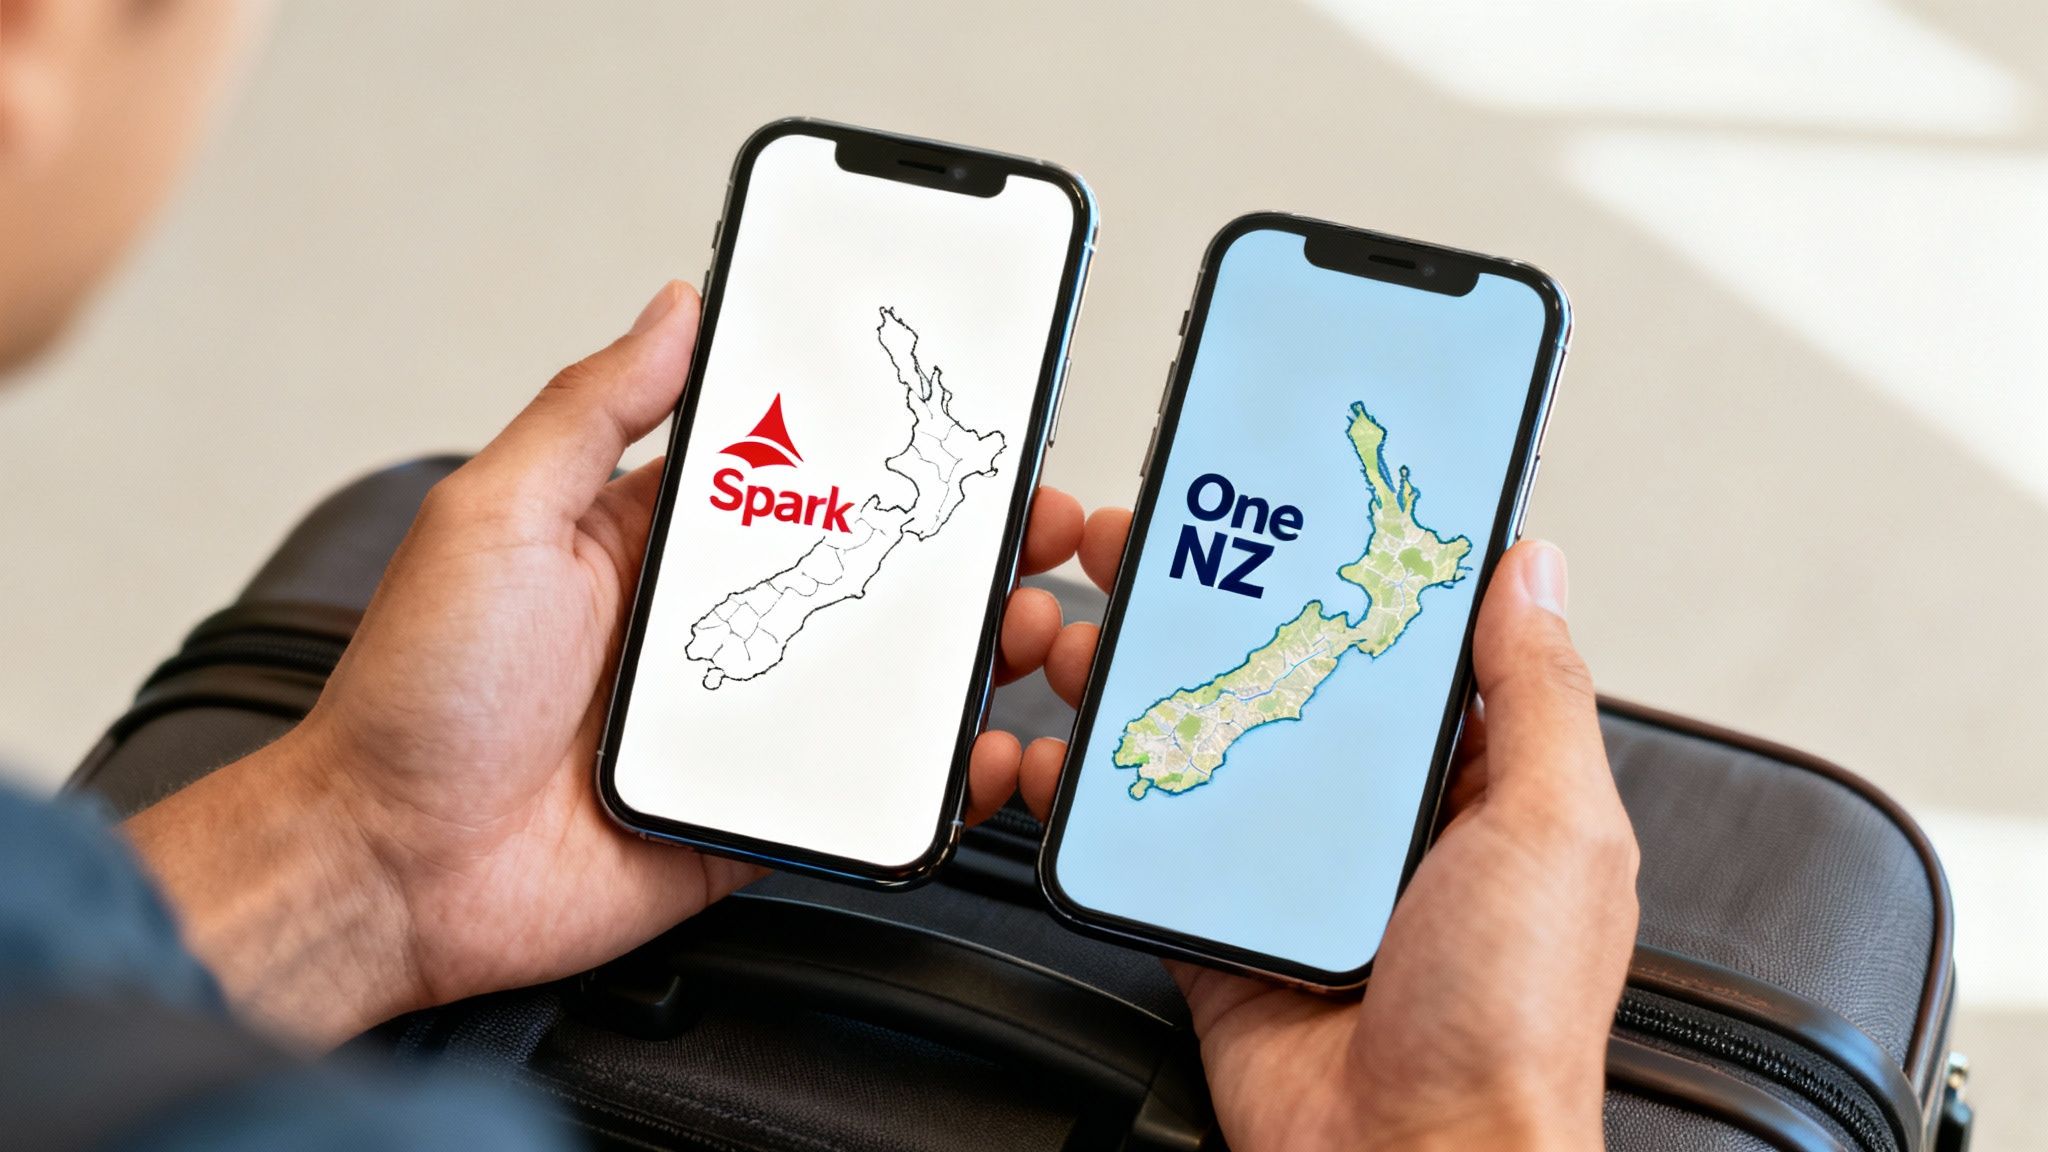
Choosing between them is a bit like picking a rental car. One might be a little cheaper, while the other is a rugged 4x4 that can handle those remote, gravel backroads. This section will break down what Spark and One NZ really offer visitors, cutting through the marketing noise.
Network Coverage Where It Counts
New Zealand is famous for its stunning, and often very remote, scenery. You’ll need a solid signal for everything from navigating Auckland’s city streets to finding a hidden beach on the Coromandel Peninsula. This is where network coverage becomes your most important consideration.
For years, Spark has built a reputation for having the most extensive and reliable network, especially when you get into rural and remote parts of the country. This makes it a fantastic choice if your plans include serious adventuring off the beaten track—think hiking in Fiordland National Park or driving the wild West Coast of the South Island.
One NZ (with all its Vodafone history) provides brilliant coverage in cities, towns, and along the main highways. While its rural reach is still very strong and competitive, Spark just tends to have the edge in the truly isolated spots. Honestly, for most people sticking to the popular tourist routes, either network will be great. But if you’re a real explorer, Spark's slightly broader coverage offers that extra bit of confidence.
A strong signal isn’t just for Instagram stories. It's a critical safety tool for checking weather forecasts, pulling up maps, and making an emergency call when you're miles from the nearest town.
A Practical Look at Tourist Plans
The great thing is, both Spark and One NZ have prepaid plans designed specifically for tourists, which makes life a lot easier. These deals usually bundle together data, calling minutes, and texts into one package that's valid for a set time.
So, how do they actually stack up? A typical tourist sim new zealand plan from either company will set you back around $30 NZD. For that, you’ll generally get something like:
- Data: Somewhere between 3GB and 4GB.
- Calls & Texts: A certain number of minutes and texts for local NZ numbers, and sometimes to a few international spots like Australia.
- Validity: Most plans last for 28 days, which is perfect for a standard holiday.
While the main offers are quite similar, the devil is in the detail. Spark might throw in a little more data for the same price, making it a better pick if you're constantly online. On the other hand, One NZ might have better international calling rates or more flexible add-ons.
Spark vs One NZ Tourist Plan Comparison
To make this even clearer, let's put some popular prepaid tourist plans side-by-side. Keep in mind that specific offers can change, but this table gives you a good sense of what to expect from each provider.
| Feature | Spark Tourist Plan | One NZ Tourist Plan |
|---|---|---|
| Typical Price | ~$30 NZD | ~$30 NZD |
| Data Allowance | 4GB | 3GB |
| Key Advantage | Best overall network coverage, especially in remote areas. | Strong performance in urban areas and major tourist spots. |
| Best For | Adventurous travellers, road trippers, and those who prioritise a reliable connection everywhere. | City explorers and visitors sticking to the main tourist trails. |
At the end of the day, this isn't about one provider being "better" than the other. It's about matching their strengths to your travel plans.
If you’re embarking on a campervan journey through Fiordland, Spark is probably your safest bet. But if you’re just hopping between Wellington, Queenstown, and Christchurch, One NZ will serve you perfectly well. Think about your itinerary first, and you'll have no trouble picking the right tourist sim new zealand to stay connected on your Aotearoa adventure.
How to Buy and Activate Your New Zealand SIM
Right, let’s get to the practical bit—getting your New Zealand SIM card bought, installed, and working. The good news is the whole process is refreshingly straightforward, designed to get you connected without any hassle after a long flight.
Whether you’ve decided on a physical SIM or an eSIM, you've got a few dead-easy options for getting your hands on one. It's just a matter of knowing where to look so you can get online and start your adventure.
Where to Purchase Your SIM Card
You won't have any trouble finding a SIM card in New Zealand. It's incredibly easy, and unlike some other countries, you don't need to flash your passport or provide any formal ID to pick up a prepaid tourist SIM.
You can grab one from several convenient spots:
- International Airports: The second you clear customs at major hubs like Auckland (AKL) or Christchurch (CHC), you’ll spot kiosks for Spark and One NZ. The staff there are pros at getting travellers sorted in minutes.
- Official Provider Stores: Pop into any city centre or big shopping mall, and you'll find the official retail shops for the main providers. This is your best bet if you have specific questions or want to compare plans in detail.
- Supermarkets and Dairies: Major supermarkets like Countdown and New World, along with local convenience stores (which Kiwis call "dairies"), all stock SIM starter packs. This is a lifesaver if you're already on the road and realise you need to get connected.
Pro Tip: Honestly, buying at the airport is often the path of least resistance. You might pay a dollar or two extra, but the sheer convenience of being connected before you've even left the terminal is absolutely worth it.
Activating a Physical SIM Card
If you've gone for a classic physical SIM, the activation is basically just "plug and play." It’s designed to be as simple as possible, and you can usually have it done yourself in under five minutes.
Here’s how it typically goes:
- Power Down Your Phone: It's always a good idea to switch your phone off completely before you start fiddling with SIM cards.
- Locate Your SIM Tray: Use a SIM ejector tool (or the end of a paperclip) to pop open that little tray on the side of your phone.
- Insert the New SIM: Place the New Zealand SIM into the tray. Make sure it's the right size—most come in a handy multi-size format you can punch out.
- Power On and Connect: Turn your phone back on. It should automatically pick up the new network (Spark or One NZ) and connect within a minute or so. You'll likely get a welcome text to confirm you're all set.
And that's it! Your data, calls, and texts should be good to go straight away.
Activating an eSIM
With an eSIM, the process is even smoother since there’s no physical card to worry about. If you bought your eSIM online before your trip, you should have received a confirmation email with a QR code.
Just follow these simple steps to get it up and running:
- Connect to Wi-Fi: You’ll need an internet connection to download the eSIM profile to your phone. The free airport Wi-Fi is perfect for this.
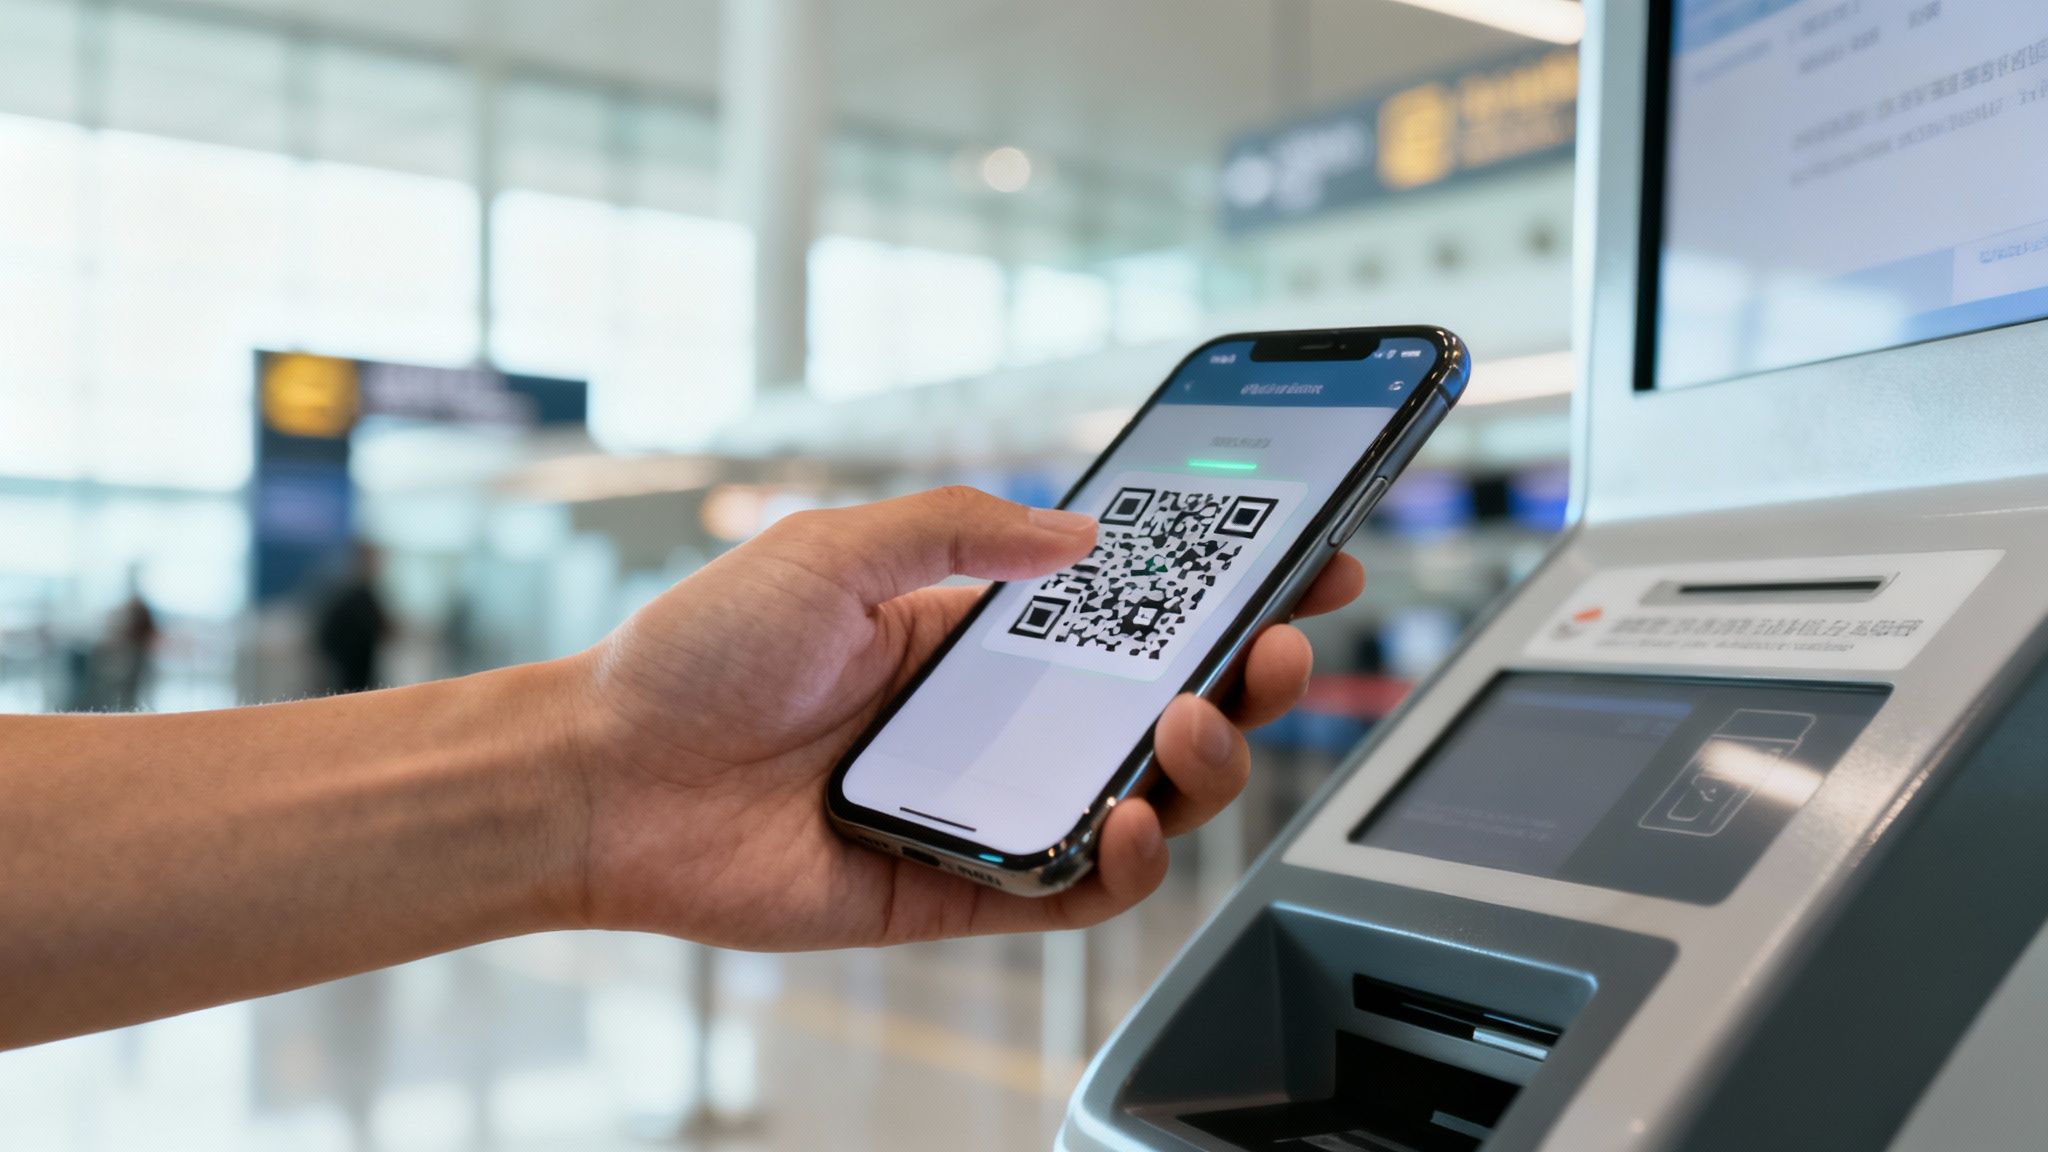
- Scan the QR Code: On your phone, navigate to Settings > Mobile > Add eSIM (or something similar). This will open your phone’s camera.
- Follow the Prompts: Point your camera at the QR code from your email. Your phone will then walk you through a couple of quick confirmation steps to install the plan.
Once it's installed, just switch it on, and you'll be connected to the local network. The real beauty of this is having everything sorted before you've even made it to the luggage carousel.
Understanding Data Plans and Avoiding Hidden Fees
Picking the right data package for your New Zealand trip is what separates a smooth, connected holiday from one full of nasty surprises. It’s about being a smart data shopper, not just grabbing the first plan you spot at the airport.
Think of gigabytes (GB) like petrol in your car. You wouldn't attempt a road trip across the South Island with just a few litres in the tank, and you shouldn't kick off your digital journey without enough data. Figuring out how much "fuel" you'll actually need is the first step toward choosing the perfect plan and ditching the stress of running on empty.
How Much Data Do You Actually Need?
Guessing your data usage can feel like a shot in the dark, but it's easier than you might think. Your habits at home are a good baseline, but travel almost always changes the equation. You'll likely be hammering Google Maps for directions, uploading photos of stunning landscapes, and hunting down reviews for that perfect flat white.
To give you a better idea, let's connect data amounts to real-world travel activities:
- The Light User (1-5GB): You're sticking to the essentials. This covers about an hour of Google Maps a day, checking emails, and some light social media scrolling (but not a lot of video). This is a great option if you plan to lean heavily on hotel and café Wi-Fi for anything more intensive.
- The Average Traveller (10-20GB): This is the sweet spot for most visitors. It'll comfortably cover daily navigation, plenty of social media use (including uploading some video stories), streaming music on those long drives, and making video calls home to show off the epic views.
- The Heavy User (40GB+): You live online, and your trip will be no different. You're planning to upload high-res videos of your bungy jump, stream movies in the campervan at night, or even use your phone as a hotspot for a laptop or tablet. If you want absolutely zero data anxiety, a bigger plan is your best bet.
A huge part of this is just knowing your own habits. For a deeper look into how data allowances work and how to choose the right amount for any trip, check out our complete guide to understanding travel data plans.
Uncovering Hidden Value and Dodging Extra Fees
Once you've got a ballpark figure for your data needs, it's time to look past the big gigabyte number on the box. The true value of a plan often hides in the details—the handy perks and, more importantly, the lack of hidden costs that can bite you later on.
Some plans come with fantastic extras, like unlimited data for specific social media apps (think Facebook or Instagram) or free access to the provider’s Wi-Fi hotspot network. These little bonuses can seriously cut down on your main data usage, giving you a lot more bang for your buck.
But the biggest trap to watch out for is accidentally leaving international roaming active on your home SIM. Forgetting to switch it off can lead to absolutely eye-watering bills. A local New Zealand tourist SIM is almost always massively cheaper than any international roaming package. Roaming charges can easily hit NZD $1 per megabyte—a cost that adds up terrifyingly fast. Compare that to a local option like the One NZ tourist SIM, which can offer up to 40GB of data for around NZD $69, and the value is obvious.
To make sure you stay in control of your spending, always check these things:
- Top-Up Rates: See what it costs to add more data if you run low. Sometimes the cost-per-gigabyte for these "add-ons" is way higher than your original plan.
- Validity Period: Make sure the plan's life (e.g., 28 days) covers your entire trip from start to finish.
- International Call Rates: If you plan to call countries outside New Zealand, find out the per-minute rates. This is a classic hidden cost.
By taking a few extra moments to check your needs and read the fine print, you can choose a plan that keeps you connected without any budget blowouts.
Got Questions About Your NZ SIM? We’ve Got Answers.
Jumping into the world of travel SIMs can feel a bit confusing, but it doesn't have to be. To make sure you’re ready for your Aotearoa adventure, we've rounded up the most common questions we get about grabbing a tourist SIM in New Zealand and laid out some clear, simple answers. Think of this as the final check to clear up any lingering doubts so you can land with total confidence.
Can I Buy a New Zealand SIM Card Before I Arrive?
Yes, absolutely! In fact, sorting this out before you go is a brilliant way to make sure you’re connected the second your plane hits the tarmac. The easiest way to do this is by grabbing an eSIM online, either from a global provider or straight from a New Zealand carrier's website, before you've even zipped up your suitcase.
It's a really simple process. Once you buy it, you'll get a QR code in your email. You can scan this to set up the plan on your phone before you fly, and then just switch it on the moment you land. This little bit of pre-trip prep is one of the biggest perks of using an eSIM.
If you prefer a classic physical SIM card, you'll usually need to pick one up when you arrive at the airport or in a local shop. While a few international sellers might offer to ship one to you, it’s rarely the most practical or budget-friendly option.
What Happens If I Run Out of Data?
Running out of data halfway through posting that perfect Milford Sound photo is a real worry, but don't stress—it's an easy fix in New Zealand. If your data hits zero, you can simply buy more. Providers like Spark and One NZ make it super easy to grab 'top-up' or 'add-on' data packs.
You’ve got a few options for getting back online:
- Use the Provider's App: This is usually the fastest way. Just open the app, pick a data pack, and pay with your card.
- Go to Their Website: Just like the app, you can log into your account on their site to buy more data.
- Visit a Retail Store: Pop into an official phone store, a supermarket, or even a local dairy (that’s Kiwi for a convenience store) to buy a top-up voucher.
It’s good to know that this extra data can sometimes cost more per gigabyte than what came with your original plan. For that reason, it’s always smart to overestimate your needs just a little and pick a plan with a generous chunk of data from the get-go. Depending on your plan, when you run out, your data might cut off completely or just slow down to a crawl until you top up.
Will My Phone From Australia or the USA Work?
For almost everyone, the answer is a big, resounding yes. Modern smartphones from places like Australia, the USA, the UK, and Canada are almost always good to go on New Zealand's mobile networks. This is because Kiwi providers use the same standard 4G and 5G frequencies that are common across the globe.
The one crucial thing you need to check is that your phone is 'unlocked'. An unlocked phone is simply one that isn’t tied to a single mobile company’s network.
Think of a locked phone like a Nespresso machine that only takes Nespresso pods. An unlocked phone is more like a coffee machine that takes pods from any brand, giving you the freedom to choose what you want.
If you bought your phone directly from a retailer like Apple or Samsung, it’s already unlocked. If you got it on a contract with your mobile provider, there’s a chance it might be locked. The best way to be sure is to give your home provider a quick call before you travel to check its status and ask them to unlock it if needed.
Do I Need My Passport to Buy a SIM Card?
Nope, you don't! This is a fantastic bit of Kiwi convenience that often catches visitors by surprise. Unlike many other countries with strict registration laws, New Zealand keeps the process super simple and tourist-friendly.
You are not required to show a passport or any ID to buy and activate a prepaid tourist SIM card. You can literally walk into a shop or an airport kiosk, grab a starter pack off the shelf, and follow the easy instructions to get it up and running yourself.
This hassle-free approach means you can get online incredibly fast, which is exactly what you want after a long-haul flight. It cuts out the annoying red tape and lets you get on with your holiday.
Should I Tell My Home Bank I Am Travelling?
While this isn't strictly about your SIM card, it’s a critical travel tip that relies on you having that connection. Yes, you should always give your bank and credit card companies a heads-up about your travel dates and destinations. A quick notification can stop them from mistakenly flagging your New Zealand transactions as fraudulent activity.
Imagine trying to pay for your first Fergburger or fill up the campervan, only for your card to be declined. With your new tourist SIM, you could easily call your bank’s international helpline, but it's much better to avoid the drama in the first place. A quick message through your online banking portal before you leave is all it takes to ensure you have smooth, hassle-free access to your money while you're away.
Ready to travel with seamless connectivity? At SimCorner, we make it easy to get a reliable tourist SIM for your New Zealand adventure before you even leave home. Check out our range of prepaid SIM cards and eSIMs at https://simcorner.com and land connected.


